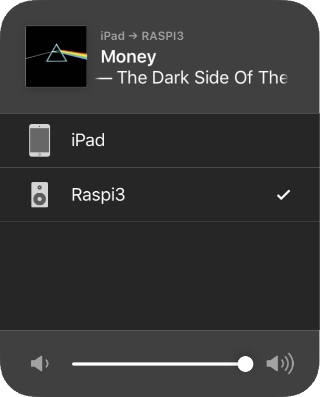
 AirPlay切替画面 |
iPadのYouTube音声をraspiで再生させるために、raspiへAirPlay接続できないかと調べたら、"shairport-sync"と云うものを利用すれば良いことが分かり、導入してみた。
●shairport-syncのインストール
沢山のサイトにインストール方法が書かれていたが、どれもBuildしてからの方法。簡単にapt-get installで出来ないかと試してみたら、出来ました(^^)/
(使用中のOSは最新のRaspbian Buster版です)
*Enable the newer audio driver(ヘッドフォンジャックの音が良くなるらしい…)
$ printf "\n# Set audio output to headphone jack\naudio_pwm_mode=2\n" | sudo tee -a /boot/config.txt

*"shairport-sync"のインストール
$ sudo apt-get install shairport-sync -y

 以下の2点がインストールされた
  libconfig9:armhf (1.5-0.4)
  shairport-sync (3.2.2-1+b2)
●shairport-syncの設定
*/etc/shairport-sync.confの設定
general{
	interpolation = "soxr"		←音が良くなるらしい SoX(Sound eXchange) Resampler
}
●最新版shairport-sync(3.3.2)の導入
どうせなら、最新版(3.3.2)を導入したくなり、Buildを面倒くさがらずに導入してみた。
*上記で導入済みのshairport-syncをアンインストール
	$ sudo apt-get --purge autoremove shairport-sync

*shairport-syncに必要なパッケージのインストール
	$ sudo apt-get install build-essential git xmltoman autoconf automake libtool \
    libpopt-dev libconfig-dev libasound2-dev libpulse-dev avahi-daemon libavahi-client-dev libssl-dev libsoxr-dev

*次に、Shairport Syncをダウンロードして設定し、コンパイル後にインストール
	$ git clone https://github.com/mikebrady/shairport-sync.git
	$ cd shairport-sync
	$ autoreconf -fi
	$ ./configure --sysconfdir=/etc --with-alsa --with-pa --with-soxr --with-avahi --with-ssl=openssl --with-systemd
	$ make
	$ sudo make install
	意外と短時間であっさり完了した。

*/etc/shairport-sync.confの設定
	general{
		interpolation = "soxr"		←旧版と同じ設定
	}

*サービスの有効化と開始
	$ sudo systemctl enable shairport-sync
	$ sudo systemctl start shairport-sync

*バージョン確認
	$ shairport-sync -V
	3.3.2-OpenSSL-Avahi-ALSA-soxr-sysconfdir:/etc
●pulseaudio経由の再生
pulseaudioで出力先(jack,bluetoothやusb等)を切り替えてもshairport-syncの出力はjackのままで替わらず、pulseaudioで切り替えた出力先にshairport-syncを何とか出力させることができないかと色々なサイト情報を元に試してみた。
*pulseaudioをsysem-wideのサービスとして起動するようにした
$ sudo nano /etc/systemd/system/pulseaudio.service
下記を新規入力

[Unit]
Description=Pulse Audio

[Service]
Type=simple
ExecStart=/usr/bin/pulseaudio --system --disallow-exit --disable-shm

[Install]
WantedBy=multi-user.target

*shairport-syncのoutput_backendをpulseaudioに設定
$ sudo nano /etc/shairport-sync.conf

general =
{
	interpolation = "soxr";
	output_backend = "pa";
}
*アクセス権は追加設定してOK
$ sudo usermod -a -G pulse,pulse-access shairport-sync

*フォルダが無い件は、起動ユーザ/グループがshairport-syncで/run/shairport-sync/.config/pulseに
 アクセスしていたので、一時的にフォルダを作ってあげた。(rebootすると消える)
$ sudo mkdir /run/shairport-sync
$ sudo mkdir /run/shairport-sync/.config
$ sudo mkdir /run/shairport-sync/.config/pulse
*サービスの無効化(shairport-syncとpulseaudioの両方共)
$ sudo systemctl stop shairport-sync
$ sudo systemctl disable shairport-sync
$ sudo systemctl stop pulseaudio
$ sudo systemctl disable pulseaudio

*起動シェルの作成
$ leafpad shairport-start.sh

#!/bin/bash

`/usr/local/bin/shairport-sync -o="pa"`		← -o="pa"は、output backendをpulseaudioに指定

*権限設定
$ chmod 755 shairport_start.sh

*autostart用デスクトップエントリの作成
$ leafpad ~/.config/autostart/shairport_start.desktop

[Desktop Entry]
Name=shairport_start.desktop
Exec=/home/user/shairport_start.sh
Type=Application
Terminal=false

*権限設定
$ chmod 755 shairport_start.desktop

$ sudo reboot
【参考】